Brookfield7

All content, of both the original Brookfield7.com and this blog, is written from my point of view and is my opinion. I believe it to be accurate at the time it is written. ~ Kyle Prast, Brookfield resident since 1986

Wednesday, November 21, 2012

Thanksgiving recipe mainstays: turkey, stuffing, mashed potatoes, yams, cranberry raw relish, apple, pecan, and pumpkin pie

The following is a re-post of What's on your Thanksgiving menu? and recipes from a few years ago with a few additions. Recipe links are below.

The turkey is the star of our Thanksgiving table, if you ask my husband. I like it too, but I don't have the same devotion to the bird that he does. If I just made a BIG turkey, lots of mashed potatoes and gravy, stuffing, fresh cranberry salad, and pie, my menfolk would consider the meal perfect.

But for my sister and I, it is the other things that make the meal complete. We love tossed salad with homemade vinaigrette dressing and a vegetable such as fresh green beans or fresh broccoli, cauliflower, and carrots with browned butter*. These are must haves in our book. (She usually brings the salad and veggies.)

In other words, we like vegetables that taste like vegetables. No pistachio pudding/fruit salad or green bean casserole or sweet potatoes with marshmallows for us. (If those items are on your must have list, great. I just figure we consume enough calories at this meal, I rather save my appetite and capacity for important things like the main course and pie!) Sometimes I might serve pickled beets or a sweet pickle of some sort to act like a taste-bud punctuation mark.

Every family has their standbys and favorites that make their Thanksgiving meal complete, and I would like to hear about your traditions.

But let's not forget that whatever is on our menu, Thanksgiving is a day to gather together with loved ones and give thanks to God for his blessings.


Thankfulness is the soil in which joy thrives
(Unknown)

Today, I must go finish up some shopping at the Elm Grove Sendiks. They are one of my last convenient sources for pasteurized whipping cream (not ultra pasteurized) for the pumpkin and pecan pie. (Pick 'n Save used to carry the cream but don't anymore. Maybe that is one reason they fell behind on the 2010 Brookfieldnow grocery store preference poll?) UPDATE: I was happy to find pasteurized whipping cream at Trader Joe's!

Recipes
Turkey: I stuff and roast the bird upside down for the complete cooking time. This makes the white meat much more juicy. This method doesn't make for the best presentation, but it does yield the best results for me. If presentation is important, you can flip it during the roasting time after about 3 hours.


Stuffing: Thanksgiving favorites: Kyle's stuffing You can make this the night before but don't stuff bird until cooking time.


Mashed potatoes:  Use Idaho or Russet potatoes. I usually figure on 2 potatoes per person, that way, I have plenty for the leftover meals that follow. About an hour and a quarter before you anticipate serving, peel the potatoes, rinse, and cut into 1 inch pieces. As you cut them up, drop them into a large kettle with plenty of cold water--to keep from darkening. (You can hold them like this until cooking time. Potatoes are a root vegetable, so you bring them to a boil, instead of dropping into boiling water. Some cooks like to add a small chopped onion and/or garlic to raw potatoes for added flavor.)

Start cooking at least 45 minutes before mealtime, add about 1 teaspoon salt to the water. Cover and put on high heat, until the potatoes come to a boil. (There should be ample water to cover potatoes and ample room in kettle to accommodate vigorous boiling.) Turn down heat to maintain a moderate boil--cook until tender--about 20-25 minutes. Test with a fork. The potato should easily yield to the fork. Take off heat. You can hold them in the hot water until you are ready to mash.

Drain the potatoes--remember to save the potato water for the gravy. Add about 1/3C of half and half or milk and put about 3T of butter into the bottom of the potato kettle. Let the butter melt before mashing. You can use a potato masher, ricer, or hand held mixer to mash. Add more milk/cream as needed to make a fluffy mashed potato--remember it is better to add cream little by little than to add too much! Taste and salt to taste. (I tend to be a low-salt cook, figuring the gravy is the real seasoning agent.) Once the potatoes reach the proper consistency, put them into a covered serving dish and set aside. Once the turkey comes out of oven, you can turn down the heat and keep the covered dish of mashed potatoes in oven until serving time.

Baked-in-their-skins yams are on the nice to have list. I just cut the ends off to let the steam out and toss on the oven rack at 350 degrees until tender about 1 1/2 hours before serving time. If done early, take them out of oven and return to heat up before serving.

Homemade gravy: 1 C flour, 1 C pan drippings, 8 C water. (Use your potato cooking water, green bean water, and plain water to make 8C.) Soak the flour in some of the water at least 1 hour before you make the gravy. After removing the turkey, pour off the fat and save.
De-glaze the pan with about half of the water, stirring constantly. Add the 1 C fat, then the flour and remaining water to make the proper consistency. Salt as needed. Strain if desired.


Cranberries: Kyle's Fresh Cranberry Relish: A happy accident (I also make the cooked ones: 1 bag berries, 1 C water, 1 C sugar. Simmer until all berries are popped.) Make each the day before, but don't mix the raw relish until Thanksgiving morning.

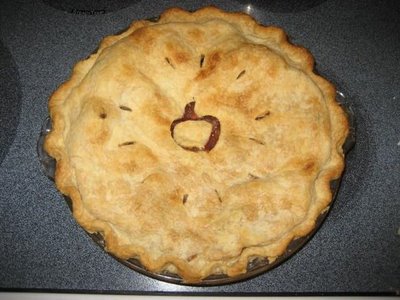
Pie: As American as Mom and Apple Pie Includes a cranberry apple variation, I make these early Thanksgiving morning before I put the turkey in the oven. Pumpkin pie is the recipe on the pumpkin can. Pecan Pie is from the 1965 Fanny Farmer Cookbook. I add twice as many pecans, however.

Pie crust: Easy as pie...really! Pie Crust Recipe


Browned butter: You can make this days ahead. In a heavy sauce pan or small saute' pan, place butter, whatever amount is desired, and put on low to medium heat. Butter will melt and as time goes on, the milk solids in the butter will start to brown and the mixture foams a bit. Watch it and stir it occasionally to prevent burning. Brown until a medium brown. It will continue to brown a bit after you remove it from the heat, so until you are experienced, err on the side of underdone. You can always heat it more. It has a delicious nutty flavor that goes well with vegetables. 

Turkey leftovers - soup: The Turkey's Last Stand

Enjoy your day! We are truly blessed.


Labels: , ,

Sunday, November 18, 2012

Welcome Trader Joe's, just in time for Thanksgiving

The new Trader Joe's in Brookfield opened on Monday,  Nov. 5th, and I breezed in after 7pm to find the parking lot jammed and the store packed. Guess people are excited to have another Trader Joe's in the area! And since Thanksgiving is fast approaching, customers will welcome their specialty foods, such as precooked turkey and turkey gravy. I understand their seasonal offerings are not to be missed.

Trader Joe's, known for good quality, healthy food at great prices, gives shoppers lots of choices. (I picked up a 12oz can of Dark Sumatra coffee today for $5.99. I'm interested in how it will stack up to my current favorite Sumatra from Alterra.)

But Trader Joe's also celebrates appointing their stores in a delightfully low-tech way. Their store signs are black boards with colorful chalk captions and prices. They don't have conveyor belts, but rather all wood check out stands. Bringing your own bag is encouraged, though they will give you one if you need. And when a cashier needs assistance, they ring their ship's bell!

Each store has its own unique design flavor, in fact, Trader Joe's loved the fact that the building site wasn't perfectly rectangular. Our Brookfield store features a bit of flower power and murals of local attractions such as the Dousman Inn on Pilgrim Road, the old train station at Brookfield Junction on Brookfield Road, Miller Park stadium and more.

Since I have been pushing for a Trader Joe's for years, even before it was an option for Underwood Crossing, you can imagine my delight in having this store within hiking distance of my house. I suspect I will still be using Aldi and the Elm Grove Sendik's for many purchases, but Trader Joe's will be a welcome addition to my favorite shopping spots.

Check it out!

Past Posts:
Hope things go well for Target / Trader Joes: Public Hearing, Jan. 2012
A Whole Lotta Diggin' Goin' On in SE Brookfield Aug. 24, 2011
Brookfield's proposed Target Store Public Hearing: Dec. 7, 2010 7:45pm, UPDATE and maps
Can it be? A Target in Brookfield? How about a Trader Joe's too? March 12, 2010
In Praise of Aldi's AND Trader Joe's: Wish We Had Both! June 4, 2008


Labels: , , ,

Thursday, June 02, 2011

Sweet 'n creamy coleslaw made easy

Good coleslaw is hard to find. Many people think it is even harder to make! Even at many delis and restaurants*, what passes for coleslaw runs the gamut of being just shredded cabbage and heavy cream (had that several times on the west coast) to something resembling cubed cabbage hearts with a horseradish-like bite--so disappointing. Some people just give up trying.

But if you love coleslaw as much as I do, don't throw in the towel. Give this simple recipe a try.

I make my coleslaw dressing from 4 basic ingredients in equal parts: mayo, cider vinegar, sugar, and cream (either sour cream, light sour cream, heavy cream, or half and half). If you don't want to use any dairy products, you can eliminate it altogether and still have a very acceptable coleslaw. Just use the mayo, sugar and vinegar in equal parts.

The Recipe: Makes enough for 4
1/2 head green cabbage
1-3 carrots
1/3 C mayonnaise--I usually use a sweet Miracle-whip type (Aldi's whipped type works great) or other mayos. Depending on the type used, it will change the taste a bit. I have used the olive oil light or other light varieties successfully, but never tried real or no fat types.
1/3 C sugar
1/3 C cider vinegar
1/3 C cream of some sort Usually this is 1/2 and 1/2 or lite sour cream for me
1/4 t. salt or to taste
scant 1/4 t. celery seed--optional

Procedure:
1. I mix the dressing in the bowl I will serve the coleslaw in--that way I don't dirty an extra dish!

2. Measure the ingredients into the bowl and stir around until mixed. (In time, you won't even have to measure. I just put blops of each of the main 4 ingredients and estimate the salt and celery seed.) I did actually measure the ingredients listed above though.

3. Remove the dark green leaves and wash the cabbage, then slice.

You can use a food processor, mandolin shredder (watch those fingers--yes, that is the voice of experience), or a very sharp knife. For a batch this size, I just use my trusty Cutco knife and slice as thin as possible, then coarsely cross cut the shreds. The shred size of coleslaw is a individual preference. You can use the bagged shredded coleslaw or broccoli slaw if you want, but I avoid it. I believe you lose nutritional value when veggies are peeled or cut in advance.

4. Place shredded cabbage in bowl on top of dressing.

5. Peel the carrots and coarsely grate with food processor or hand held grater. If using hand held one, I place that right on top of the cabbage in the bowl and grate directly onto the slaw. (That way I avoid cleaning up the carrot juice on the cutting board!)

If serving later in the day or next, cover with plastic wrap and refrigerate. If you are taking to a picnic, pour the dressing into a jar or container with a tight lid, then mix it with the cabbage once there.

When ready to serve, toss and mix well, and TASTE. You might want to add a little more salt, make it a little more zippy with more vinegar, make sweeter with more sugar, or creamier with more sour cream or 1/2 and 1/2.

Hope you give this coleslaw a try. I have found that even kids like it--must be all the sugar! Once I made it with red cabbage and called it Barney-slaw. (It turns the color of Barney!)

You can add some a little shredded red cabbage for color, little pieces of sweet pickle, pineapple tidbits, snipped chives, or even peanuts. Don't be afraid to make changes and make it your own.

*Red Lobster and Chili's serve what I consider to be good coleslaw.

Links: Practically Speaking, Fairly Conservative, RandyMelchert, Betterbrookfield, Jay Weber, Vicki McKenna, CNS News, Mark Levin, Breitbart BigGovernment, The Heritage Foundation

Labels:

Wednesday, November 24, 2010

Archive: I love my repairman - Thanksgiving is saved!

Originally posted Nov. 19, 2007
My oven is back in business , thanks to my resident repairman--my son--pictured above. (Two days ago, I almost had a Chernobyl--my oven wouldn't shut off!)

Friday night, he searched the internet and ordered the parts. Today, the parts arrived. Tonight, he fixed the oven. Thanksgiving is saved!

By the way, I take no credit for his abilities. We never formally studied electronics in the 13 years I taught him. He just was interested and I had the good sense to get out of his way.

My husband and I always encouraged our son to do real work at an early age though, and he taught our son quite a bit about electricity and volt meters etc. while doing work around the house.

I think kids can do far more than we give them credit for. We tend to insulate them and keep them in the play workshop world too long instead of letting them do real jobs (with close supervision, of course).

Here is the culprit--a small, innocent looking relay--that because of its failure, could have burned down the house!

The surprising thing was that they were German made. We were expecting them to be of Chinese origin. Both were replaced*, so the oven is back in business.

My final Thanksgiving food tip is to cook the turkey upside down.

I have done this for years and it results in very juicy white meat. I usually start it upside down for at least 1 1/2 - 2 hours. Since we don't carve the bird at the table, presentation is not an issue, so I left it upside down 1 hour longer last year. If you have those new silicone hot mitts, you can just grab the turkey and turn it back right side up after the allotted time and let it finish baking. If you don't have the mitts, turning can be a little challenging--but worth it in juicy white meat.

Maybe tomorrow I will get back to blogging about 4K**. I needed to take a break and talk about more pleasant things for a bit, so thanks for bearing with me. The recipes also gave me a chance to try out an older laptop that came my way with the remote desktop feature on my computer. That was fun!

UPDATES: *Since this post was written, these relays failed again in 2010 and needed to be replaced.

**We thought we killed 4K back in 2007 when I originally wrote this post , but here we are in 2010 bringing it up again as a money maker for the Elmbrook School district.

Links: Practically Speaking, Betterbrookfield, RandyMelchert, Jay Weber, Vicki McKenna, The Right View Wisconsin, CNS News, Mark Levin, Breitbart BigGovernment, The Heritage Foundation

Labels: , , , , ,

Tuesday, November 23, 2010

What's on your Thanksgiving menu? & Recipes

Recipe links are at bottom of post

The turkey is the star of our Thanksgiving table, if you ask my husband. I like it too, but I don't have the same devotion to the bird that he does. If I just made a BIG turkey, lots of mashed potatoes and gravy, stuffing, fresh cranberry salad, and pie, my menfolk would consider the meal perfect.

But for my sister and I, it is the other things that make the meal complete. We love tossed salad with homemade vinaigrette dressing and a vegetable such as fresh green beans or fresh broccoli, cauliflower, and carrots with browned butter*. These are must haves in our book. (She usually brings the salad and veggies.)

Baked-in-their-skins yams are on the nice to have list. I just cut the ends off to let the steam out and toss on the oven rack at 350 degrees until tender. Sometimes I might serve pickled beets or a sweet pickle of some sort to act like a taste-bud punctuation mark.

In other words, we like vegetables that taste like vegetables. No pistachio pudding/fruit salad or green bean casserole or sweet potatoes with marshmallows for us. (If those items are on your must have list, great. I just figure we consume enough calories at this meal, I rather save my appetite and capacity for important things like the main course and pie!)

Every family has their standbys and favorites that make their Thanksgiving meal complete, and I would like to hear about your traditions.

But let's not forget that whatever is on our menu, Thanksgiving is a day to gather together with loved ones and give thanks to God for his blessings.


Thankfulness is the soil in which joy thrives
(Unknown)

Today, I must go finish up some shopping at the Elm Grove Sendiks. They are one of my last convenient sources for pasteurized whipping cream (not ultra pasteurized) for the pumpkin pie and Gille's vanilla custard for the apple pie. (Pick 'n Save used to carry these items but don't anymore. Maybe that is one reason they are falling behind on the Brookfieldnow grocery store preference poll?)

Recipes
Turkey: I roast upside down for the complete cooking time. This makes the white meat much more juicy. This method doesn't make for the best presentation, but it does yield the best results for me. If presentation is important, you can flip it during the roasting time after about 3 hours.

Homemade gravy: 1 C flour, 1 C pan drippings, 8 C water. (Use your potato cooking water, green bean water, and plain water to make 8C.) Soak the flour in some of the water at least 1 hour before you make the gravy. After removing the turkey, pour off the fat and save.
Deglaze the pan with about half of the water, stirring constantly. Add the 1 C fat, then the flour and remaining water to make the proper consistency. Salt as needed. Strain if desired.

Stuffing: Thanksgiving favorites: Kyle's stuffing

Cranberries: Kyle's Fresh Cranberry Relish: A happy accident (I also make the cooked ones: 1 bag berries, 1 C water, 1 C sugar. Simmer until all berries are popped.)

Pie: As American as Mom and Apple Pie Includes a cranberry apple variation

Pie crust: Easy as pie...really! Pie Crust Recipe

Turkey leftovers - soup: The Turkey's Last Stand

Browned butter: In a heavy sauce pan or small saute' pan, place butter, whatever amount is desired, and put on low to medium heat. Butter will melt and as time goes on, the milk solids in the butter will start to brown and the mixture foams a bit. Watch it and stir it occasionally to prevent burning. Brown until a medium brown. It will continue to brown a bit after you remove it from the heat, so until you are experienced, err on the side of underdone. You can always heat it more. It has a delicious nutty flavor that goes well with vegetables.

Links: Practically Speaking, Betterbrookfield, RandyMelchert, Jay Weber, Vicki McKenna, The Right View Wisconsin, CNS News, Mark Levin, Breitbart BigGovernment, The Heritage Foundation

Labels: , ,

Monday, November 22, 2010

Archive: The Turkey's Last Stand....Turkey Soup

Original Post: Nov. 27, 2007

This is not a political commentary posting! It is about soup.

I grew up in a home that was not very enthused about turkey, but I married a turkey-a-holic!

It must be an inherited trait on the Y chromosome, because both my guys cannot get enough of the big bird!

Sadly, our turkey leftovers are history, but there is one last meal to be had from our Thanksgiving feast, and that is turkey soup. I make it just as I would chicken soup.

I take the roasted carcass and pick off all the meat I can and refrigerate. Place the bones, scraps, and even the skin into a large soup pot.

Cover with water and add a small onion, stalk of celery, and carrot. A few parsley stalks are good too. Simmer for a few hours.

Strain the contents through a colander into a big bowl or another pot and return the broth to the soup kettle. Skim off excess fat.

Peel a few carrots and slice into disks, chop a med. onion, and slice up a few celery stalks and add these to the pot.

Simmer an hour longer and taste. Add salt and pepper to taste and some freshly chopped parsley (or dried).

By this time the bones are cool enough to go through, removing any pieces of meat. Put the meat in the broth.

Add more of the meat you set aside when you started the soup and cut into bite-sized pieces and toss in the pot.

Now you have a choice to make: Turkey Dumpling Soup or Turkey, Rosemary, Rice Soup.

For Turkey Dumpling, just take 1 beaten egg, 1 t salt, and 1 C white flour. Mix together until you can't get any more four into the egg and break off little pieces of the dough and toss into the boiling broth. Cook about 20 min. My guys really like these crude dumplings, so I make double the amount.

For the Turkey, Rosemary, Rice soup, add a sprig of rosemary to the soup, some cooked brown and wild rice (if you have any), and a few drops of Tabasco sauce. This of course it to taste. Simmer 20 minutes and then fish out the rosemary. If you have a herb bag or large tea ball, this would keep the rosemary leaves together. This soup creation came from a friend and we really like it just as well as the dumpling variation.

Depending on how much turkey you had to start with, you might have to add a little chicken bullion to make it more flavorful.

Anyway, turkey soup, either variation, has become a real family favorite. I freeze the left overs and keep them for future meals. It is like money in the bank!

Try it with your Christmas Turkey.

Links: Practically Speaking, Betterbrookfield, RandyMelchert, Jay Weber, Vicki McKenna, The Right View Wisconsin, CNS News, Mark Levin, Breitbart BigGovernment, The Heritage Foundation

Labels: , ,

Archive: Easy as pie--really! Pie Crust Recipe

Original Post: Nov. 18, 2007

I cannot remember when I made my first pie; maybe I was 7 years old? Mom always let my sister and I help in the kitchen and taught us to cook and bake at an early age. The great thing about it was that she did not mind that it looked like a disaster area when we finished. It is a fond memory that I hold in my heart.

Many people are very afraid of making a pie. I think it might be because they don't have a good pie crust recipe to start with. I think Mom's recipe came from the Settlement Cookbook. It is a good, simple, basic recipe. I've never had a flop and never heard a complaint.

Here's the recipe--enough for 2 double crust or 4 single crust pies:

3 cups of all purpose, unbleached white flour -not bread flour

1 teaspoon salt

1 1/3 cups of real, salted butter OR 2/3 cup of real, salted butter and 2/3 cup of lard (yes, lard) I tend to use all butter simply because I always have it on hand. Lard makes a flakier crust.

½ cup of very cold water

The process:

Measure the flour and salt into a large mixing bowl.

With a pastry cutter, cut in 2/3 cup of the butter. (A pastry cutter is an inexpensive gizmo with a handle and multiple semi-circle dull blades--obtainable even from the widget section in the grocery store cooking accessories isle.) Keep cutting, pressing the cutter through the butter into the flour, until the texture is even. The color will be an even creamy tone.

Add the lard or remaining portion of butter and cut in again. This time you want to stop before it is all finely worked in. Stop when the largest chunks are the size of very small peas.

Next, fluff up the butter/lard/flour/salt mixture with a fork. Run the cold water until it is very cold and measure out ½ cup. Drizzle it into the mixture while tossing with a fork until the water is distributed. Here is where you must be careful. DO NOT OVER MIX! Over mixing will develop the gluten in the flour and make your crust tough. Properly done, your dough will probably be somewhat crumbly with some white looking streaks. This is fine.

Most recipes say to chill now. I have never needed to do that, but if your kitchen is very warm, you may want to chill for a half hour. You can also put it in the refrigerator and use it later in the week. I press down the crust dough in the bowl and cover with plastic wrap. You can also freeze it in a plastic bag for future use.

When it is time to roll out the pie crust, get out the pastry canvas and pin sock. These are essential to pie making. You can use a stiff piece of laundered canvas or other tightly woven cotton cloth for the canvas. If you cannot find a pin sock, I have used a leg from a pair of clean pantie hose. Just cut off the leg and slip over the rolling pin. Leave an inch or so extra on each end and cut off the foot. Liberally flour the cloth and the rolling pin. That means you sprinkle on flour and work it into the fabric with your hand.

Cut the pie dough into 4 parts. With your hands, form the quarter section of the dough into a round, flattened disk, patting it into shape. Lay it in the center of the floured canvas. Take the rolling pin and start to gently press it into the center in a cross mark and roll outwards. You are flattening it out a little at a time. Continue rolling it in all directions, keeping its round shape. If it starts sticking to the canvas or pin, put more flour on the fabric. Roll from the center to the edges.

When it is about 1 to 1½ inches bigger than your pie pan all the way around (hold the pan over the crust to estimate) you are ready to put it into the pan. It will be a scant 1/8 inch thick. I roll the crust loosely onto the pin--about half way (here is where the canvas really helps you out; you can lift the cloth up from one side and help maneuver the pastry onto the pin)--and then lift the crust over the pan and lower it into place. Put the outer edge about ¾ - 1 inch over the pie pan edge. Then unroll the remaining crust. Re-center if needed. Ease the crust down to the bottom edges of the pan. If it cracks a little, just squish the edges back together. If you need to put in a patch (a piece of extra rolled out crust from the edge) just wet the area to be patched (use your finger or pastry brush) and put the piece of crust on top. Gently pat into place. No one will ever know!

Now if this is a double crust pie, you repeat the roll out, leave it on the canvas and make the filling. After the filling is in the pie shell, some people brush the edge of the crust in the pie pan with a little water (it acts like glue), but I don't. Once the filling is in the pie shell, repeat the loose roll up of half the pie crust onto the pin and transfer to the pie shell. Start at one edge, leaving that extra margin of crust to hang over the edge and unroll.

For either single or double crust pies, the crimp phase is pretty much the same. First, cut the excess of crust off the pie-I use a butter knife or small paring knife for this. I support the crust with my finger from underneath and cut into it. I leave about ½ inch for double crust and 3/4 inch for single crust pies beyond the pie pan edge. Then start to gently turn and tuck that extra pie dough under all around the pie. Once you have gone around the pie once, go around again and push into place any irregular spots. The idea is to make it an even thickness.

Note that for single crust pies, there is a tendency for the crust to slip into the pie when blind baking (baking the crust with no filling in it--such as for a banana cream pie). To avoid this, make sure you do not stretch the crust to fit the pan. In fact, try to ease a little extra crust down into the pie pan.

Now comes the fun part: the crimp or decorative edge. The simplest method is to just use a fork dipped in flour to prevent sticking and press down gently to make little ridges. My favorite is the peaked crimp. For this one, I first pinch the crust edge into a raised lip all the way around the crust edge. Then using the knuckle of my right forefinger and thumb and forefinger of my left hand, I gently coax the dough into the pinch of my left two fingers with the knuckle of my right. Keeping my fingers lightly floured will keep the dough from sticking.

Be sure to cut ample steam vents into that top crust, or your crust will be soggy. This can be simply done, or in an artistic design. Sometimes I write the name of the pie into the crust with little slits or make hole in the center apple shaped, for an apple pie and add some extra crust apple leaves.

For a double crust fruit pie, bake at 450 degrees in a pre-heated oven (very important) for 15 minutes, then turn down to 350 degrees for about 45 minutes. Because I like to really fill up my pies, usually I need to bake longer at 350-at least until I see the filling bubbling inside.

If you are baking a single crust pie, blind (no filling), be sure to *** the crust bottom with a fork before you put it into the pre-heated 450 degree oven. This prevents large bubbles from forming in the crust. These you bake at 450 for 8 to 10 minutes. Check after about 6 min. You don't want it to get too brown. I have as of late started at 450 degrees and then turned down to 425 once the shell is in the oven. This seems to give me a good crust that does not get too brown.

You can make a fancier crust edge by using small cookie cutter shapes of pie dough and gluing onto crust edge with water. Martha Stewart had some very pretty pie edges on page 36 of her November magazine issue.

Sometimes I make some pretty shapes such as a free form Maple leaf or cookie cutter hearts, etc. to place on top of the whipped cream on a pumpkin pie. If you plan on doing this edge, cut more off your crust edge before you turn it under. Otherwise there will be too much crust under the cut outs. For shapes, roll out your crust as usual and cut out the shapes. You will need to flour the cutters to prevent sticking. Place on an un-greased cookie sheet. Bake as you would the single, blind crust, but check after a few minutes. The smaller shapes bake faster. You can also sprinkle these with cinnamon and sugar before baking. Better tell your family these are spoken for though, or they may disappear before you get them on the finished pie!

Glass pie pans are my favorites. They make a much crisper crust. Aluminum would be my second choice. (I won't use that horrid baker's secret tin ware.)

One lady recently told me her grandmother always replaced 1 t. of water with 1 t. cider vinegar per double crust pie. She said it made for a flakier crust. I may just try that trick. Let me know if you ever tried that one

I know many people like to use the Cuisinart for crust. I have one and have used it, but I still prefer to do it by hand. I think you have more control by hand.

For a little extra zip, I have used about 1/4 C lemon juice mixed with enough powdered sugar to make a thin frosting. I then drizzle it over an apple pie. Yum.

PS Dad sometimes would make pies too, so don't think pie making is only for women!


Links: Practically Speaking, Betterbrookfield, RandyMelchert, Jay Weber, Vicki McKenna, The Right View Wisconsin, CNS News, Mark Levin, Breitbart BigGovernment, The Heritage Foundation

Labels: ,

Archive: As American as Mom and Apple Pie

Original Post: Nov. 18, 2007

What would Thanksgiving be without apple pie? I have the traditional recipe from my mother here and also a pretty variation: Kyle's Apple Cranberry Pie. (I can't leave a recipe alone!)

Mom's Apple Pie

Enough pie crust for a double crust pie.

Apples: A combination of Macintosh, Golden Delicious, and Granny Smith

½ cup to 2/3 cup sugar (I use ½ for an 8 inch crust and 2/3 for a 10 inch-again, our family likes things on the tart side)


2 Tablespoons of unbleached white flour (I have since changed to 1 T flour and 1T instant tapioca-it makes for a more translucent juice with a better consistency)

Cinnamon

Butter to dot the top, about 4 teaspoons

Procedure:

Preheat oven to 450 degrees.

Have the crust rolled out and ready: the bottom crust in the pie pan (I prefer glass unless you are freezing it first), and the top, ready to go, rolled out on the pastry cloth.

Wash the apples and start cutting one of each into quarters. Cut out the core and peel with a sharp paring knife. Cut each quarter into 3 to 4 sections. Arrange with the peeled side out around the bottom of the crust. Keep cutting up the apples and putting into the pie shell. While you don't have to make art work of this job, you don't want large pockets of air. I like to keep piling the apple pieces up until they mound up about 1 ½ inches above the pie pan edge level.

Mix up the sugar and flour (flour and tapioca) in a bowl. Add in cinnamon. This is to taste. Sprinkle some on and stir it in.

Spoon the sugary mixture over the apples in the pie pan. Try to get it down into the cracks and spaces between the apples if you can.

Cut up the butter into about 8 pieces and place evenly over the apples and sugar mixture.

Now put the top crust on. Pat the edges together and cut off excess crust leaving about ½ to 5/8 inch extra beyond the pie plate edge. Use a butter knife or small paring knife to cut through the crust, gently supporting from the underside the crust with your finger.

Fold under about ½ inch of the crust until the entire pie edge has been tucked under. Go around again and pat and form into a nice, even smooth edge. Crimp or decorate the edge.

Cut steam vents into the top. Use a knife and just cut slits about 1 ½ inch from the pie edge. Be sure to cut enough slits--it prevents soggy crust. You can also cut words or shapes into the top.

Place into the oven and bake for 15 minutes at 450 degrees. Turn oven down to 350 degrees and bake for another 45 minutes. Filling should be bubbling inside when done. If crust gets too brown, cut off strips of aluminum foil and loosely put over the pie edges.

Take out of the oven and set aside to cool.

For best results, serve on the same day you bake the pie.

If you wish to make them ahead, then freeze when you have the pie completed, but still unbaked. (Use aluminum pie pan, not glass.) When you want the pie, bake frozen. You will probably have to increase the 350 degree bake time.

Cranberry Variation:

Apples: Mixture of Macintosh, Golden Delicious, and Granny Smith - about 3 of each for a large pie

1 cup raw cranberries, washed

2/3 cup sugar

1 Tablespoon of white, unbleached flour

1 Tablespoon of instant tapioca

Cinnamon

Butter, about 4 teaspoons

Prepare as the Mom's Apple Pie above, but sprinkle the cranberries evenly through the apples in the pie shell.

The cranberries add a pretty color to the pie and give it a nice tart flavor. The tapioca keeps the juices from running too much and yet it is not too thick.

Macintosh apples break down in cooking and fill in the empty spaces. Golden Delicious keep their shape. Granny Smith give a nice, tart flavor.


Links: Practically Speaking, Betterbrookfield, RandyMelchert, Jay Weber, Vicki McKenna, The Right View Wisconsin, CNS News, Mark Levin, Breitbart BigGovernment, The Heritage Foundation

Labels: , ,

Archive: Kyle's Fresh Cranberry Relish: a happy accident

Original Post: Nov. 17, 2007

I was first introduced to raw cranberry relish at my mother-in-law's table, before I was married. It was a Prast family favorite. When it was time for me to host my first turkey dinner, I made what I thought was like my husband's mother's recipe. It wasn't. As it turned out, everyone liked my variation better!


This relish is ridiculously easy to make and is good at any time of year with pork, ham, chicken, and of course, turkey. You will need a food processor though, or it won't work.

Ingredients:

1 bag, 12 ounces, of fresh cranberries, washed (*frozen berries can be used too)

1 navel orange, scrubbed

¾ to 1 cup sugar (I use ¾ because we like things on the tart side-it is also less sugar!)

3 ribs of celery, diced-not the dark green outer ribs but the more mild flavored medium to light green ones

½ to 1 cup of coarsely chopped walnuts (I do this by hand as it yields a more even texture)

The Process:


First, cut the ends off of the orange, just far enough to reach the flesh of the orange. Trim off any blemishes on the peeling. Cut the orange in half and then each half into quarters.

Place the 8 pieces of orange, still with the peeling on, into the food processor, with the chopping blade installed. Pulse until the orange is chopped into approx ¼ inch bits. Some will be smaller, some larger. Set aside.

Next, put the cranberries into the food processor (no need to wash the work bowl). Pulse until the berries are at least quartered. Again, some pieces will be smaller, some larger. (Some people like them more finely chopped, I don't.)

Place the chopped berries into a mixing bowl and add the oranges, sugar, celery and walnuts and stir. It takes a few minutes for the sugar to dissolve. Serve. Coarsely chopped fresh pineapple can be added too for a different twist.

This salad can be made the day ahead of Thanksgiving, but I like to keep the ingredients separated. I just put the chopped berries in the serving bowl first, then the pile of chopped oranges. I put the sugar in a zip loc bag, celery in another small zip loc and walnuts in a 3rd bag. I place the baggies on top of the berries and oranges and cover the whole bowl with plastic wrap and put in refrigerator until the next day. An hour or two before serving time, I just mix all the ingredients together. I found this delayed mix method works better-it makes a prettier presentation. If mixed too early, the red bleeds into the orange, walnuts, and celery. (It still tastes fine the next day though).

*Fresh cranberries aren't available all year, so I make sure I buy extra bags for the freezer.


Links: Practically Speaking, Betterbrookfield, RandyMelchert, Jay Weber, Vicki McKenna, The Right View Wisconsin, CNS News, Mark Levin, Breitbart BigGovernment, The Heritage Foundation

Labels: , ,

Archive: Thanksgiving favorites: Kyle's stuffing

Original posting: Nov. 18, 2007

One year when a family member had to avoid bread (wheat allergy), I improvised on my mom’s traditional stuffing recipe by replacing the bread with brown rice, wild rice and chopped rye crisp crackers. It was good!

We all liked the rice and rye flavor so much that when bread no longer needed to be avoided, I kept the rice and rye bread ingredients and incorporated them in this new stuffing recipe. I have been using it ever since.

Ingredients:

1 stick real butter

3 cups diced celery

9 T. chopped fresh parsley – if you’re lucky, there is still some from your garden

(4 ½ T. dried parsley may be substituted)

½ cup chopped onion

12 slices of bread, cubed.

(I like a mixture of a good rye, whole wheat (Manitowoc Ovens Hunger Filler is a favorite for this), and a white, such as Manitowoc Ovens English Muffin bread or a nice potato bread. The bread should have some body to it, not that soft, cottony type.

Freshly ground pepper—a few turns of the grinder do it for me

½ # (pre-cooked weight) wild rice – cooked (you can do this ahead of time)

1 # (pre-cooked weight) brown rice – you will need to cook this too before assembling

¼ cup roasted, unsalted sunflower seeds

1 teaspoon salt

1 to 1½ teaspoons dried marjoram

½ to 1 teaspoon ground sage (to taste, some people do not like sage)

*Optional: sliced mushrooms, coarsely chopped pecans, chopped apple, etc.

Preparation:

In a large frying pan, melt the butter and gently sauté the onions. Add the celery until translucent. Add the bread and remaining ingredients and mix together. Taste it to make sure all is well.

I make my stuffing the day before Thanksgiving and keep it refrigerated in a plastic bag.

DO NOT pre-stuff the turkey the day before. I have heard this is a no-no because of possible bacteria build up.

When you are ready to bake the bird, spoon stuffing loosely into the cavity and pin/truss shut. The remaining stuffing can be put into a greased, covered casserole dish. I put this extra stuffing in the oven to bake closer to meal time for about 30 to 45 min. Baste it with some of the cooked turkey juices and stir the basting juices into the stuffing. (The turkey should be almost done now). Be careful the extra stuffing does not get too browned or the rice will get hard. When you scoop out the stuffing from the turkey, you can mix it into this extra stuffing in the casserole dish.

FYI: When I cook rice, I cook up a large batch and then freeze it in smaller amounts (for my family, 1-2 C. for brown and ½-1 C. for wild). This really helps when preparing meals that require some cooked rice. Sometimes, just the thought of having to cook the rice first can be rather defeating.

I do not cook my brown rice as long as the directions tell you. I put the rice into a large pot with plenty of cold water and start it cooking. About 20 to 30 minutes is usually sufficient. I then drain it and rinse. Brown rice is infinitely more nutritious than white, and I think it is tastier too.


Links: Practically Speaking, Betterbrookfield, RandyMelchert, Jay Weber, Vicki McKenna, The Right View Wisconsin, CNS News, Mark Levin, Breitbart BigGovernment, The Heritage Foundation

Labels: , ,

Wednesday, October 13, 2010

Need a job? Try Brookfield's new ParkSide23 restaurant

While shopping at Angelina's Deli, my favorite Italian food store on this side of town, I noticed some construction workers across the street at the former Pilgrim Square.

Wow, something is finally going in at the vacant Sticks and Stones restaurant, just south of Dixon Elementary School, on North Avenue. There were also 2 big lime green HELP WANTED signs. I wonder what is going in there?

As I checked out at Angelina's, I asked the sales lady if she knew. She replied, Well, the workers who come in here say it is a new Eddie Martini's.

Oh, I said--a little puzzled, that is interesting since the Eddie Martini's isn't all that far from here.

Yes, but they are really doing well, she replied.

The HELP WANTED signs in front stated APPLY IN PERSON, MONDAY - FRIDAY, 9 -4 PM PARKSIDE 23

Hmm, no mention of Eddie's on the sign?

Once home, I Googled a bit and found that ParkSide 23 is indeed owned by the same parent company as Eddie's, the De Rosa Corporation. This is also the same company that owned the former Sticks & Stones restaurant, that has been empty for more than 3 years. (They also own The Chancery chain.)

That info was supplied by Carol Deptolla, the Milwaukee Journal Sentinel food critic in an allbusiness piece, Casual eatery to open in Brookfield, Aug. 13, 2010.

Unlike Eddie Martini's, ParkSide23 will be casual. I read on to discover Brookfield's Common Council approved "plans that include outdoor seating for the restaurant, at 2300 Pilgrim Square Drive, and a garden to supply produce for the restaurant - a hint, perhaps, at the restaurant's format."

That all sounded good to me. Since my family is always looking for a good restaurant, maybe ParkSide23 will become our favorite Sunday lunch spot after church?

Eddie Martini's has a very good reputation, but dinner there is just too pricey for me. (I tend to lose my appetite once the entree price-tag goes above $20--even for a special occasion.) Hopefully ParkSide23 will offer excellent food at a more affordable price. I wish them well and much success to you too if you are applying for a job!

Links: Practically Speaking, Betterbrookfield, RandyMelchert, Jay Weber, Vicki McKenna, The Right View Wisconsin, CNS News, Mark Levin, Breitbart BigGovernment, The Heritage Foundation

Labels: , , ,

Monday, July 12, 2010

The "Cheap Date" - dinner & movie under $14

Last Friday night, my husband and I went on a cheap date. We had had a busy week getting our kitchen emptied out for the floor re-finishers, so cooking was out of the question. We were both too tired to go out for dinner at one of our favorite places like Singha Thai,* but we did need to eat dinner.

How about going to that new Asian place at Brookfield Marketplace?, I asked. That seemed to click. The Asian Chef, the latest addition to Brookfield Marketplace, just moved in a few weeks ago and so far, is getting rave reviews, at least from us and some of our neighbors.

Asian Chef offers a wide variety of choices and even lets you choose white or brown rice. The cost/value quotient seems right too. You can get a very adequate lunch or dinner for $4.75. (Some choices are more.) Since there really wasn't a good place to eat amid our chaos at home, we chose to dine in.

After our tasty dinner we went over to the Pick 'n Save to see if they had one of those Red Box movie rental for a $1 kiosks. Yes, they did. We picked out Invictus, starring Morgan Freeman and Matt Damon. That proved to be a winner too. It was a great story of South Africa during their early post apartheid days in 1995. Freeman plays President Nelson Mandela; Damon plays Francois Pienaar, the nation's Rugby star. Mandela uses the country's nearly all white Rugby team to unite the country.

The closeup shots of the Rugby games were reason enough to watch this movie. (Yikes, they make American football players look like wimps!) But watching a segregated nation come together was the real story. Invictus was inspiring.

Spoiler alert: My favorite scene was when the underdog South African team played New Zealand, the favorite, in the World Cup. New Zealand attributed their success to the Maori war dance that they did just prior to every game. It was very intimidating. In contrast, the South African team got on their knees on the field and thanked God for their win. It was one of those good vs. evil moments.

Rating: Invictus was rated PG-13. There was only 1 F-bomb that I heard, and it was said with a rather thick accent. There was one scene where Damon and his wife are shown in an embrace and they fall onto a bed in a hotel room. The audience doesn't see them on the bed though. So as movies go, it is pretty tame. Check out what Common Sense media has to say about the movie if you are unsure your teens should watch.

So that was our cheap date. Sometimes simple is simply perfect!

*Number 80, Crispy Basket is the family favorite there. It is outstanding.

Links: Practically Speaking, Betterbrookfield, RandyMelchert, Jay Weber, Vicki McKenna, The Right View Wisconsin, CNS News, Mark Levin, Breitbart BigGovernment, The Heritage Foundation

Labels: , , , ,

Sunday, April 25, 2010

Do it yourself Tiramisu, really!

Tiramisu is one of those desserts that has been gaining in popularity in recent years. My first experience with this coffee infused, creamy delight was from a vendor at Italy, at Disney World's Epcot. Once tasted, I was hooked. It was heavenly.

But could I make it myself? Why not?

You will need a double boiler and approx. 3 quart size spring form pan or Trifle type glass bowl. You could also do it individually in pretty stemmed glasses.

Here is the recipe* I used, along with my comments in italics.

Classic Tiramisu ~ Serves 10 - 12

The Ingredients:
6 egg yolks (you may freeze and save the egg whites for future desserts such as Schaum Torte)
1 1/4 C sugar
1/1/4 C mascarpone cheese**
1 3/4 C heavy whipping cream - I used 2 Cups (1 pint) total of regular pasteurized, NOT ULTRA pasteurized, saving some for garnish.
2 packages of Lady Fingers - 6 oz total
1/3 C coffee liqueur - I used 1 T coffee liqueur + brewed espresso to make 1/2 cup total liquid
Sweetened whipped cream for garnish
Unsweetened cocoa powder for garnish
Chocolate curls for garnish

The Procedure:
  1. Place bowl you plan to whip the cream in, in the refrigerator. A chilled bowl and beaters (you will put those in later) are essential for whipping cream successfully!
  2. Combine the egg yolks and sugar and whip until thick and lemon colored, about 1 minute.
  3. Place sugar/egg mixture in the top of a double boiler over boiling water.
  4. Reduce the heat to low immediately and cook 8 - 10 minutes, while stirring constantly! I use a silicone rubber scraper to stir, that way you completely scrape the bottom of the pan with each swipe.
  5. Remove from the heat and cool to room temperature.
  6. Add the mascarpone cheese and beat well.
  7. Wash off beaters and place in refrigerator to chill a bit.
  8. Whip the heavy cream until stiff peaks form, being careful not to over-whip or you will make butter. Having the cream, bowl and beaters very cold helps prevent this. Save about 1 1/4 Cups of the whipped cream for garnish.
  9. Fold the majority of the whipped cream into the cooled egg yolk mixture and set aside. I usually first put a little whipped cream into the yolks/cheese and fold to soften the mixture, then fold in the rest of the whipped cream.
  10. Add about 1 to 2 Tablespoons of confectioners sugar and 1/2 teaspoon vanilla to the reserved whipped cream and whip just until mixed. Refrigerate and save this for the garnish.
Assembling the Tiramisu:
  1. Open the lady finger packages and split the fingers apart.
  2. Line the bottom and sides of a 3-quart bowl or spring form with the ladyfingers, uncut side out.
  3. Brush cut edges of ladyfingers with the coffee mixture
  4. Spoon half of the egg yolk/cream mixture into the ladyfinger pan/bowl.
  5. Repeat, placing more ladyfingers on top of the 1st layer of egg/cream, espresso, and remaining egg/cream mixture. Smooth out top surface.
  6. Put unsweetened cocoa into a small sieve and evenly sprinkle on top of Tiramisu.
  7. Pile the sweetened whipped cream in the center or in dollops on each individual serving. Garnish with chocolate curls if desired. I like Dove brand dark chocolate bars for this. Curls work better when chocolate is at room temperature. Use a potato peeler to run down edge of chocolate bar.
  8. Cover loosely with plastic wrap (don't let wrap touch top) and put into refrigerator.
Serving Tiramisu:
Some people slice it like a cheesecake; some spoon it like a Trifle. It is rather dependent on which type of pan/bowl you assemble it in. If you have stemware, it could be assembled for individual servings in goblets.

We found out the Tiramisu was actually better the next day. The ladyfingers soaked up the moisture and developed a melt in your mouth texture. If delaying serving, you may wish to wait to garnish with the whipped cream and sprinkle with the cocoa and choc. shavings until the day of serving.

So give Tiramisu a try. I have made it twice. It usually commands a high price when at a restaurant and frankly, it is still pretty expensive to make at home. The mascarpone cheese is pricey, about $8.00, as are the ladyfingers. But considering the cost per slice at a restaurant runs $5 - $8, making it yourself is still cheaper. (I purchased the mascarapone cheese and ladyfingers at Grasch Foods. Once I even found the cheese at ALDI!)

Cost saving measures:
The ladyfinger package I purchased also included a do it yourself mascarpone cheese substitute recipe, but I have not tried it. It calls for 1 8oz package of cream cheese, 1/4 C sour cream and 2 Tablespoons of whipping cream. Mix until blended and fluffy. If I ever try the homemade, I will try to post a review.

For an alternative for ladyfingers, I'm thinking you could make your own sponge cake, bake in a jelly roll pan, and slice up into strips? Maybe it could be baked in round cake pans and layered as a torte? There is an easy recipe in Betty Crocker for a sponge cake cake roll. I think that would work great. A Tiramisu cake roll? Maybe next time!

Buon Appetito!

*I looked on the Internet, found a recipe, and purchased the ingredients. But when I really read through the recipe, it seemed a bit out of order. It called for whipping the egg yolks after cooking! How would that work? Must be a mistake.

There was a recipe on the ladyfinger package that affirmed my suspicions--the Internet recipe was incorrect. (I would have made the ladyfingers too but was pressed for time.) The ingredients were identical to the Internet version, just the procedure was different.

Links: Practically Speaking, Betterbrookfield, RandyMelchert, Jay Weber, Vicki McKenna, The Right View Wisconsin, CNS News, Mark Levin, Breitbart BigGovernment, The Heritage Foundation

Labels: , ,

Friday, October 09, 2009

Too many tomatoes got you in a jam? Try tomato jam!

Sometimes a homegrown tomato supply can be a feast or famine situation; after waiting forever for the first few fruits, they then all ripen at the same time. So, if you have had your fill of BLTs and tomato salads, maybe you would like to try this old fashioned favorite: tomato jam.

Tomato jam is rarely seen on the store shelves. Smucker's used to make it (don't know if they still do.) The only time I ever saw it on a menu was at Le Cellier Steakhouse at the Canada Pavilion at Disney World's EPCOT. It was spread on top of their open faced steak sandwich and it's flavor complimented the beef very nicely.

My mom made tomato jam every summer when I was a girl. and I often would help. I loved the way the jam looked in the jar with the lemon slices and cinnamon sticks showing through the glass. I also loved eating the jam on toast. When the jar was finally empty, it was a kid treat to suck on the cinnamon stick.

In my opinion, tomato jam goes rather well on light rye bread toast and served with scrambled eggs or cheese omelets.

Our recipe came from my Great Aunt Martha. Jam is best made in small batches. I usually just make the amount in 1 recipe. It makes about 4 cups of jam. You could process the jam in a water bath with canning jars and lids, but I just make it and keep it in the refrigerator. It keeps for a year or so.

Here it is: Aunt Martha's Tomato Jam

1 1/2 lemons, washed, cut in quarters, then thin sliced. Remove pips.
3 Cups tomatoes that have been peeled and cut into 1 inch pieces.
4 Cups sugar
1/2 Tablespoon butter
Cinnamon stick 1 for each jar

Small jelly or jam jars, pints or half pint jars and lids (washed in a dishwasher or sterilized) These can be canning jars and lids or used jelly or jam jars and lids that have been washed.

The process:
In a stainless steel kettle 3 quart size or larger, put in 2 C. tomatoes and 2 C. sugar into the pot. Sir in the 1/2 Tablespoon of butter to prevent scum from forming. Boil for 5 minutes. Stir to prevent burning.

Without taking off the heat, add 1 C. mixed tomatoes and lemons and another C. sugar. Boil 5 minutes more.

Add last C. mixed tomatoes and lemons and last cup sugar. Boil 5 minutes more.

Take off heat. Be careful; this is hot stuff!

Put cinnamon stick into each jar. Ladle jam into the warm jars. (I keep them in a warm oven until needed.) Leave about 1/2 inch space at top of jar. Wipe the top edge of jar with clean, damp cloth. Put jar lid on and turn upside down then back. Set aside to cool. Often the jar lids will seal down without processing--even the recycled commercial jam jars. Put in refrigerator the next day for storage.

If you want to process the jam in a water bath so you don't have to refrigerate, use canning jars and lids. Process for 10 to 15 minutes for pints.

Sometimes the jam turns out stiff; sometimes it is thin. I think it might have something to do with the amount of pectin in the lemons? Regardless of the thickness, I love the stuff. Hope you will too.

I just picked most of my remaining green tomatoes. Hopefully, they will still ripen indoors. If so, maybe a batch of tomato jam is in my future too.

Links: Practically Speaking, Fairly Conservative, Betterbrookfield, RandyMelchert, Jay Weber, Vicki McKenna, The Right View Wisconsin, CNS News, Mark Levin, Breitbart BigGovernment, The Heritage Foundation

Labels: ,